Bodi Empowerment
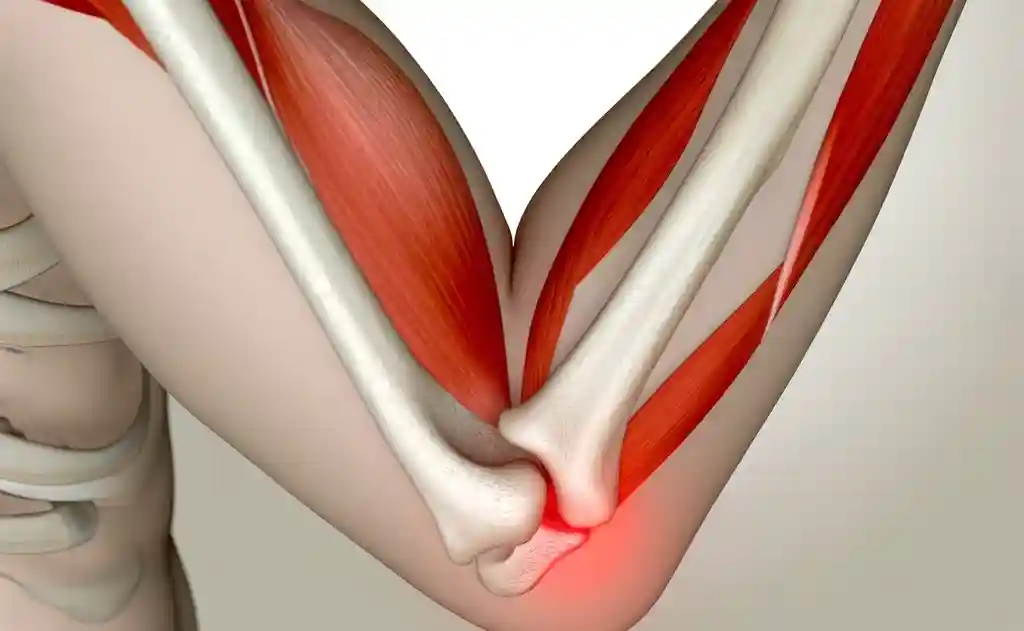
Elbow //
Fix your Rounded Shoulders In 7 Easy Steps

Please follow and like us:
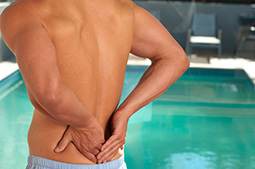
How can you tell if your shoulders are too rounded?
Try this test to see if you have rounded shoulders. Stand up and put your hands by your side. Where are your thumbs?

The best way to determine if your shoulders are rounded, without professional expertise like that of a chiropractor, is to stand with your hands at your sides. If your thumbs turn forward or outward, your shoulders likely aren’t rounded. However, if your thumbs turn inward toward each other, your shoulders are likely rounded, and you may benefit from the exercises outlined below.
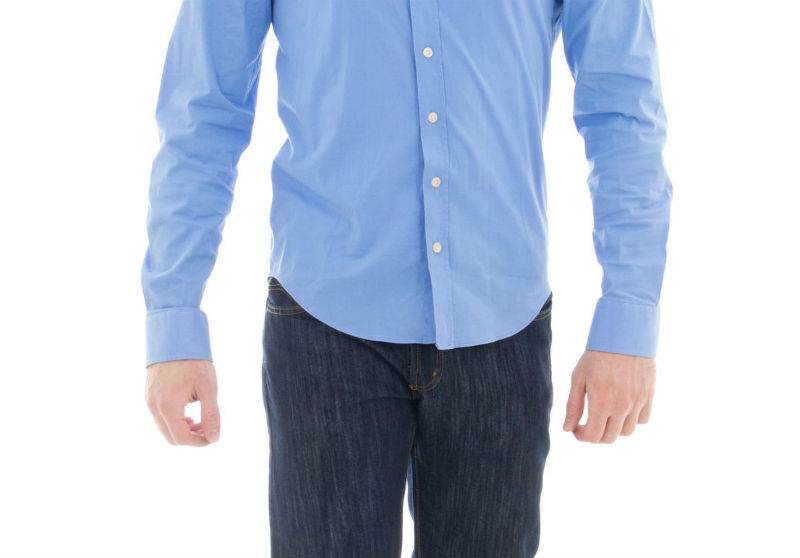
The picture above shows that his left is turned in quite a bit, while the right is only slightly turned in.
There are 4 Steps to fixing your rounded shoulders.
#1 Foam Roll Your Mid Back Fix Your Rounded Shoulders
Fixing your rounded shoulders requires that your mid back is in proper alignment. The more rounded your mid back the more likely that your shoulders are going to be rounded.
Here is a link for mid-back exercises if that is your main concern.

- Lie on a foam roll at the level of the shoulder blades.
- Hold onto your neck to protect it.
- Lie on the foam roll for 30 seconds to 2 minutes.
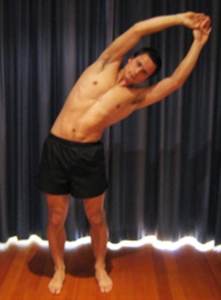
Exercise #2. Stretch Your Subscapularis To Fix Your Rounded Shoulders

Preparation:
Stand tall with your feet shoulder-width apart and your back straight. Hold the stick or broom horizontally behind your back with both hands, gripping it slightly wider than shoulder-width apart.
Positioning:
Position the stick or broom behind your back so that it rests along your spine, with your palms facing outward and thumbs pointing downward. Your elbows should be slightly bent.
Stretching Arm:
Start by gently sliding one hand upward along the stick or broom toward the opposite shoulder blade. Your goal is to reach as high up the stick as comfortably as possible.
Counterbalance:
As you raise one hand, the other hand will naturally move downward along the stick to maintain balance and stability. Allow this counterbalancing motion to occur naturally.
Stretching Position:
Once you’ve reached as far up the stick as possible, hold the stretched position for 15-30 seconds while maintaining steady breathing and avoiding any discomfort or pain.
Focus on Relaxation:
While holding the stretch, focus on relaxing your shoulder and allowing the subscapularis muscle to lengthen gradually. Avoid tensing or straining during the stretch.
Repeat on the Other Side:
After holding the stretch, gently release the tension and switch to the other arm. Repeat the same stretching process on the opposite side to ensure balanced flexibility.
Repetition and Sets:
Aim to perform 2-3 sets of the subscapularis stretch on each side, gradually increasing the duration of each stretch as your flexibility improves over time.
Consistency and Progression:
Consistency is key to seeing improvements in flexibility. Incorporate this stretch into your routine and monitor your progress over time. If the stretch becomes too easy, you can gradually increase the duration or intensity to continue challenging your muscles.
Exercise #3 Stretch Your Lats To Fix Your Rounded Shoulders
Starting Position:
Begin by standing upright with your feet hip-width apart and your arms relaxed at your sides.
Arm Extension:
Slowly raise both arms above your head, reaching upward and lengthening your spine.
Hand Grab:
With your arms extended overhead, grasp your right hand with your left hand.
Side Lean:
While maintaining the grip on your hands, gently lean your upper body to the left side, keeping your feet grounded.
Feel the Stretch:
As you lean, focus on feeling the stretch along your entire right side, from the shoulder down to the lower back.
Exercise Caution:
If you have a lower back problem, it’s advisable to proceed with caution and avoid certain movements that may exacerbate discomfort.
Hold and Repeat:
Hold the stretched position for about 30 seconds, allowing your muscles to relax and elongate.
Repeat the stretch for a total of 3 sets to improve flexibility and alleviate tension in the targeted areas.
#4 Stretch Your Pec Minor Muscle To Fix Your Rounded Shoulders
Positioning by the Doorway:
Stand in front of a doorway or wall, ensuring you have enough space to move comfortably.
Elbow Positioning:
Bend your elbow at a 90-degree angle, placing your forearm against the doorway with your hand flat on the surface.
Forward Movement:
Slowly move your body forward, maintaining contact between your elbow and the doorway. Progress until you feel a stretch in the chest, particularly in the pec minor area, similar to where the man in the illustration is touching.
Hold the Stretch:
Once you feel the chest stretch, hold the position for approximately 30 seconds. This stretch primarily targets the pec major muscle.
Pec Minor Stretch:
Following the pec major stretch, adjust your hand position by moving it upward along the doorway until you feel a stretch again, focusing on the pec minor area.
Extended Hold:
Hold the stretch for 30 seconds to a minute, allowing the muscles to lengthen and relax effectively.
Repetition:
Repeat the entire sequence for a total of 3 times to maximize the benefits of the stretch routine and enhance flexibility in the chest muscles.
#5. Strengthen Your Rhomboid To Fix Your Rounded Shoulders
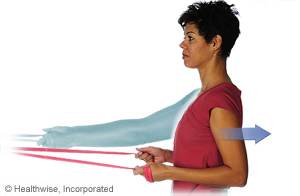
Core Bracing:
Begin by bracing your core, engaging your abdominal muscles, and maintaining a neutral spine position to ensure stability and support.
Adjusting the Theraband:
Initially, ensure that the Theraband is slightly taut but not overly tight to start the exercise comfortably.
Pulling Motion:
With the Theraband securely in place, pull the band toward your body, ensuring that your elbow passes your torso.
Shoulder Blade Squeeze:
As you pull the band, focus on squeezing your shoulder blades together to engage the muscles of the upper back effectively.
Repetitions and Sets:
Perform 3 sets of 15 repetitions, maintaining controlled movements throughout each set.
By following these steps, you can effectively engage your core and upper back muscles while using the Theraband for resistance training.
#6 Strengthen your external Rotators To Fix Your Rounded Shoulders
Positioning:
Stand tall with your feet shoulder-width apart and your knees slightly bent to maintain stability throughout the exercise. You can also sit like in the video above.
Grip:
Grasp one end of the Theraband in each hand, making sure your palms are facing each other and your elbows are bent at a 90-degree angle.
Tension:
Create tension in the Theraband by pulling it slightly apart, ensuring there is resistance throughout the movement.
Rotation:
Keeping your elbows close to your sides and your upper arms stationary, externally rotate your forearms away from your body until they are parallel to the floor.
Squeeze and Control:
At the end of the movement, pause briefly and squeeze your shoulder blades together to engage the muscles of the upper back.
Return to Starting Position:
Slowly and with control, return to the starting position, bringing your forearms back in front of your body while maintaining tension in the Theraband.
Repetition:
Repeat the external rotation movement for the desired number of repetitions, typically 10-15 repetitions per set, depending on your fitness level and goals.
Sets:
Aim to complete 2-3 sets of the bilateral Theraband external rotation exercise, allowing for adequate rest between sets to optimize muscle recovery.
Form and Breathing:
Focus on maintaining proper form throughout the exercise, and remember to breathe steadily and exhale as you perform the rotation movement.
#7 Strengthen Your Serratus Anterior To Fix Your Rounded Shoulders
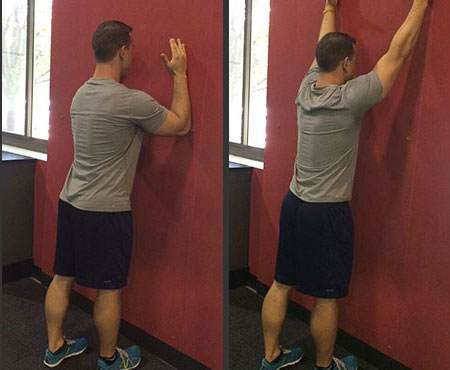
Anterior wall slides are another beneficial exercise for improving shoulder stability and strengthening the serratus anterior muscle. Here’s how to perform anterior wall slides:
Starting Position:
Stand facing a wall with your feet hip-width apart and your toes about 6-12 inches away from the base of the wall. Maintain a neutral spine and relaxed shoulders.
Hand Placement:
Raise your arms to shoulder height and place your palms flat against the wall, keeping your elbows slightly bent. Your elbows should be at shoulder height, forming a goalpost position.
Engage the Serratus Anterior:
Before initiating the movement, engage your serratus anterior muscles by protracting your shoulder blades forward, away from the spine. This action creates space between the shoulder blades and the wall.
Sliding Movement:
Slowly slide your hands upward along the wall while keeping your elbows and wrists in contact with the surface. Aim to raise your arms as high as you comfortably can without arching your lower back or allowing your ribs to flare.
Maintain Engagement:
Throughout the movement, focus on maintaining activation of the serratus anterior muscles to prevent the shoulder blades from winging or retracting against the wall. Keep the movement smooth and controlled.
Full Range of Motion:
Once your arms reach their highest position without losing contact with the wall, hold the position briefly to emphasize the contraction of the serratus anterior.
Return to Starting Position:
Slowly lower your arms back down to the starting position, maintaining control and keeping the shoulder blades protracted throughout the descent.
Repetition and Sets:
Aim to perform 10-15 repetitions of anterior wall slides for 2-3 sets, depending on your fitness level and tolerance. Gradually increase repetitions and sets as you become more proficient with the exercise.
Focus on Quality:
Pay attention to maintaining proper form and technique throughout each repetition, focusing on quality over quantity to effectively target and strengthen the serratus anterior muscles.
Tell us your thoughts in the comments below and like us on Facebook. This downtown Toronto Chiropractor will do his best to answer your questions.
Picture References
Exercise #2 http://www.floota.com/SubscapularisStretch2.html
#5 https://myhealth.alberta.ca/Health/aftercareinformation/pages/conditions.aspx?hwid=zp4503
Exercise #7 https://www.active.com/fitness/articles/upper-body-warm-up-exercises/slide-5
Please follow and like us:
Dr. Ken, has been recognized as the Best Toronto Chiropractor in 2024, 2023, and 2018, here in downtown Toronto. As a sports chiropractor, he excels in treating a wide range of conditions including concussions, temporomandibular joint disorders (TMJ), sports-related injuries, and spinal issues. Beyond his clinical skills, Dr. Ken is an accomplished athlete, having represented Ontario in the Canadian Judo Championships and completed the Toronto Marathon on two occasions. He employs the innovative C3 Program to provide targeted and effective care to his patients, ensuring a holistic approach to their well-being and athletic performance.